Edge & Self-hosted Deployment
TL;DR: Cloud deployment isn't the only option. Learn about edge computing and self-hosted deployment: running AI systems closer to where data is generated or on your own hardware. Discover when these approaches make sense and how to implement them on devices like Raspberry Pi and home servers.
In Cloud Deployment, we explored how to deploy AI systems to remote data centers. For many applications, the cloud is indeed the most practical choice. But there are compelling scenarios where bringing computation closer to users or running on your own hardware makes more sense.
Consider a smart security camera that detects suspicious activity. Sending every video frame to the cloud for analysis creates privacy concerns, wastes bandwidth, and introduces latency. What if the internet connection drops? A better approach runs the AI model directly on the camera or a nearby device, processing video locally and only sending alerts when something important is detected. This is edge computing.
Or imagine you're a researcher with sensitive medical data, or a small business wanting to avoid recurring cloud bills, or simply someone who values control over your infrastructure. In these cases, self-hosted deployment (running services on hardware you own and control) becomes attractive. For example, I have a home server where I self-host most of my entertainment, daily, and storage needs: Plex media server, Immich photo server, Nextcloud file sharing, and more.
Understanding Edge & Self-hosting
Before diving into implementation, we need to understand what these terms mean and how they differ from the cloud deployment we've already covered.
What is Edge Computing?
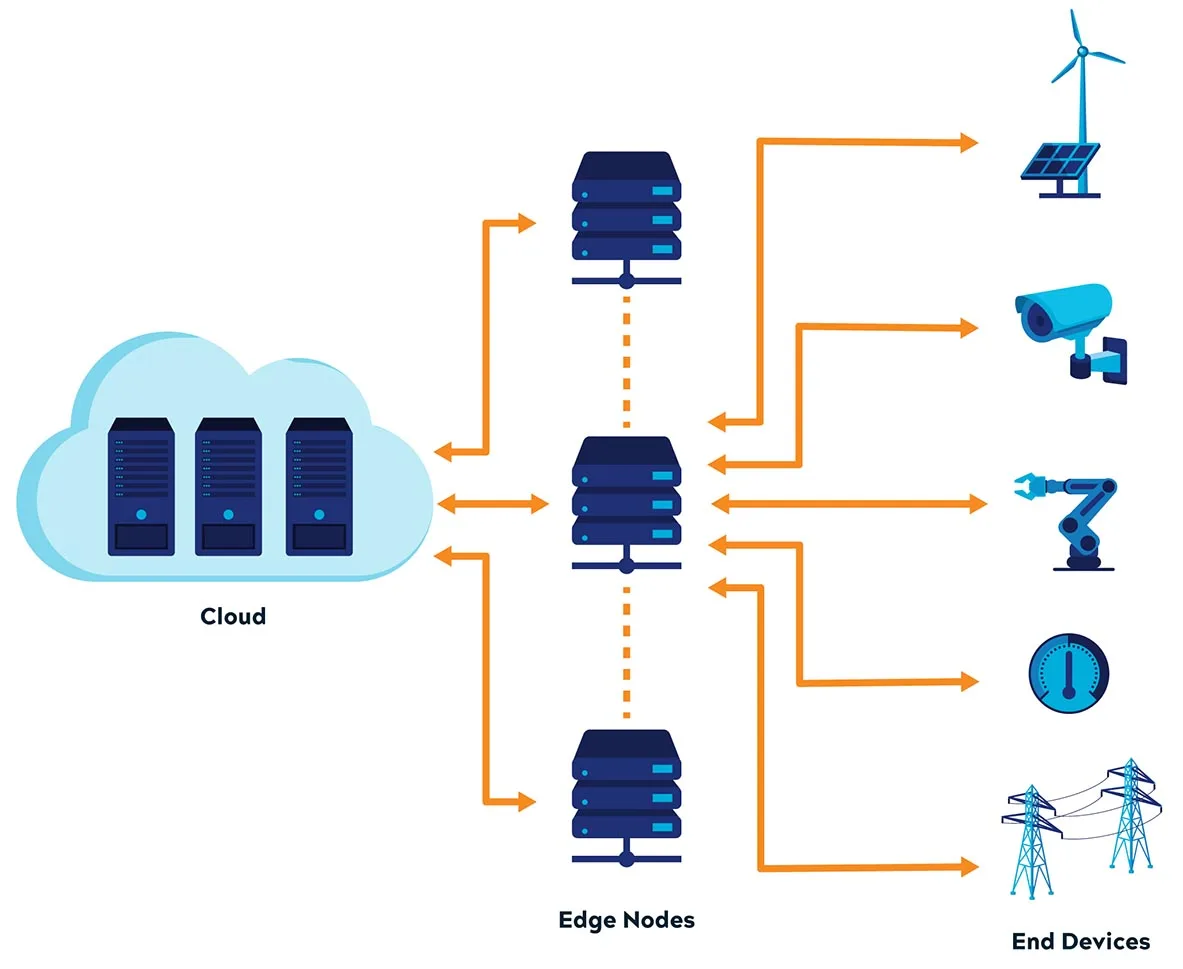
Edge computing brings computation and data storage closer to where data is being generated and where it's needed, rather than relying on a central cloud location that might be hundreds or thousands of miles away.
The term "edge" simply refers to devices at the boundary of a network, where data is actually created or where people interact with systems. Think smartphones, smart home devices, sensors in factories, self-driving cars, or a server sitting in an office closet.
You've probably seen edge computing in action without realizing it. A Raspberry Pi, that tiny €50 computer the size of a credit card, can run AI models for home projects. The Raspberry Pi AI Camera runs object detection directly on the camera itself, spotting people, cars, or pets in real-time without ever sending video to the cloud. Tech YouTuber Jeff Geerling has built some impressive setups, like a Raspberry Pi AI PC with multiple neural processors for local AI processing. For more demanding applications, Nvidia Jetson boards pack serious GPU power into a small package. The Jetson community has built everything from bird identification systems that recognize 80 species by sound, to indoor robots that map your home and remember where you left things.
Why does edge computing matter for AI? Processing data locally means faster responses since information doesn't need to travel across the internet. It also saves bandwidth by only sending relevant results instead of raw data. Privacy improves because sensitive information stays on your device. And perhaps most importantly, edge systems work even when the internet goes down.
What is Self-Hosted Deployment?
Here's something you might not have realized: you've been doing self-hosted deployment throughout this entire course. Every time you ran your AI API server on your own computer, that was self-hosting. Self-hosted deployment simply means running your applications on hardware you own and control, rather than renting resources from cloud providers.
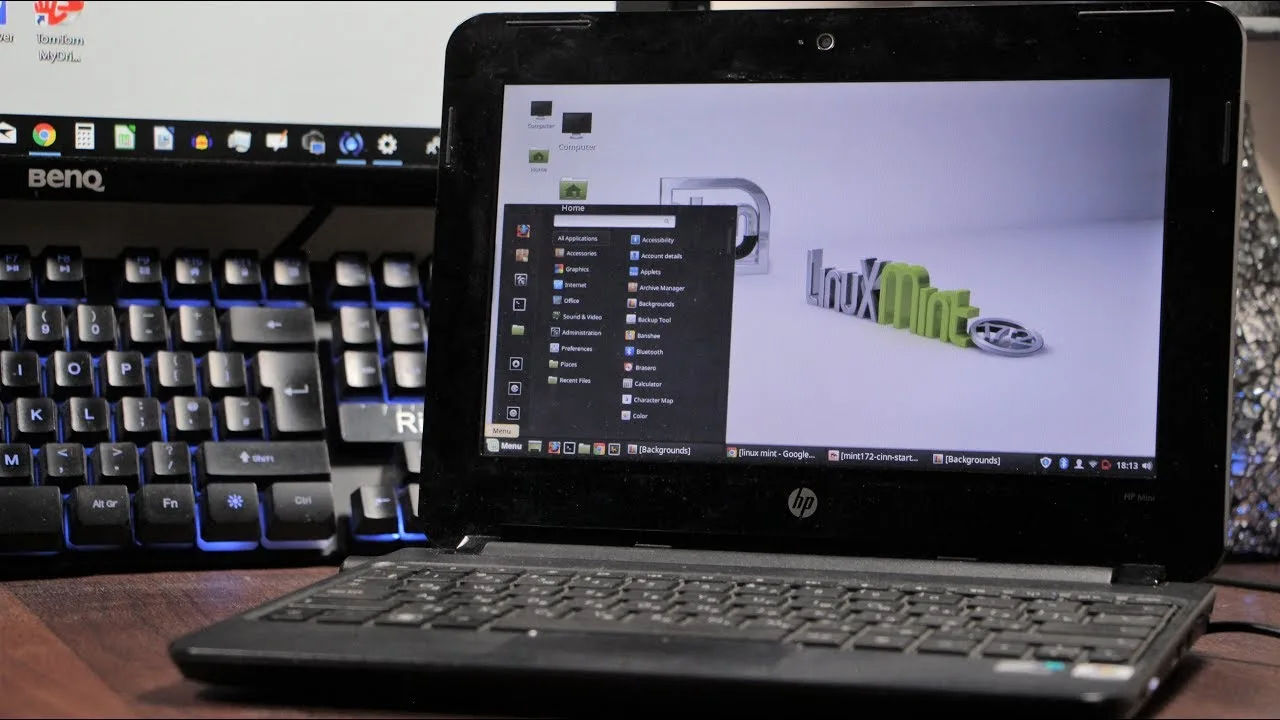
The beauty of self-hosting is that it works at any scale. At the simplest level, you're repurposing hardware you already have. That old laptop collecting dust in a drawer? Install Linux on it and you have a perfectly capable home server. An old desktop that would otherwise go to the landfill can run your AI models, host your files, or serve your applications. Even a Raspberry Pi or a NAS (Network Attached Storage) device can run containerized services.
But self-hosting isn't just about recycling old hardware. Building a new system from scratch can make economic sense too. Consider storage: major cloud providers charge around €18-24 per terabyte per month (budget providers like Backblaze start around €5/TB). If you need 10TB of storage from a major provider, that's €180-240 monthly, adding up to €2,160-2,880 per year. You could build a dedicated storage server with multiple hard drives for €900-1,400, breaking even in under a year. After that, it's essentially free (minus electricity). Plus, transferring files over your home network is dramatically faster than uploading or downloading from the cloud. Gigabit ethernet gives you around 100MB/s transfer speeds, while most home internet uploads max out at 10-50MB/s.

Beyond economics, self-hosting gives you complete control. Your data stays on your hardware, in your home or office. There are no monthly bills that can suddenly increase, no vendor lock-in forcing you to use proprietary APIs, and no worrying about whether a cloud provider will shut down your account. For learners, self-hosting offers hands-on experience with real infrastructure that you can't get from managed cloud services. And if you need specialized hardware like GPUs for AI work, owning the equipment often makes more sense than paying cloud providers' premium hourly rates, especially if you're using it regularly.
The Relationship Between Edge and Self-Hosted
Edge computing and self-hosted deployment are distinct ideas, but we cover them together in this module because they share practical challenges. Both involve working with hardware you have physical access to, whether that's a Raspberry Pi on your desk or a server in your office. Both require you to manage limited resources compared to the cloud's seemingly infinite capacity. When something breaks, you can't just open a support ticket; you need to troubleshoot and fix it yourself. The deployment techniques are also similar: you're installing operating systems, configuring networks, running containers, and ensuring services stay up, whether on edge devices or self-hosted servers. Most importantly, the skills you learn deploying to a Raspberry Pi at the edge transfer directly to managing a self-hosted server at home, and vice versa.
Videos:
Edge & Self-Hosted Deployment in Practice
Now that you understand the concepts, let's get practical. We'll walk through deploying your containerized AI API server to edge and self-hosted hardware. Since we already covered Docker installation and running containers in Cloud Deployment, we'll focus on what's different when working with physical hardware you control.
Choosing Your Hardware
The hardware you choose depends on your use case, budget, and what you might already have available.
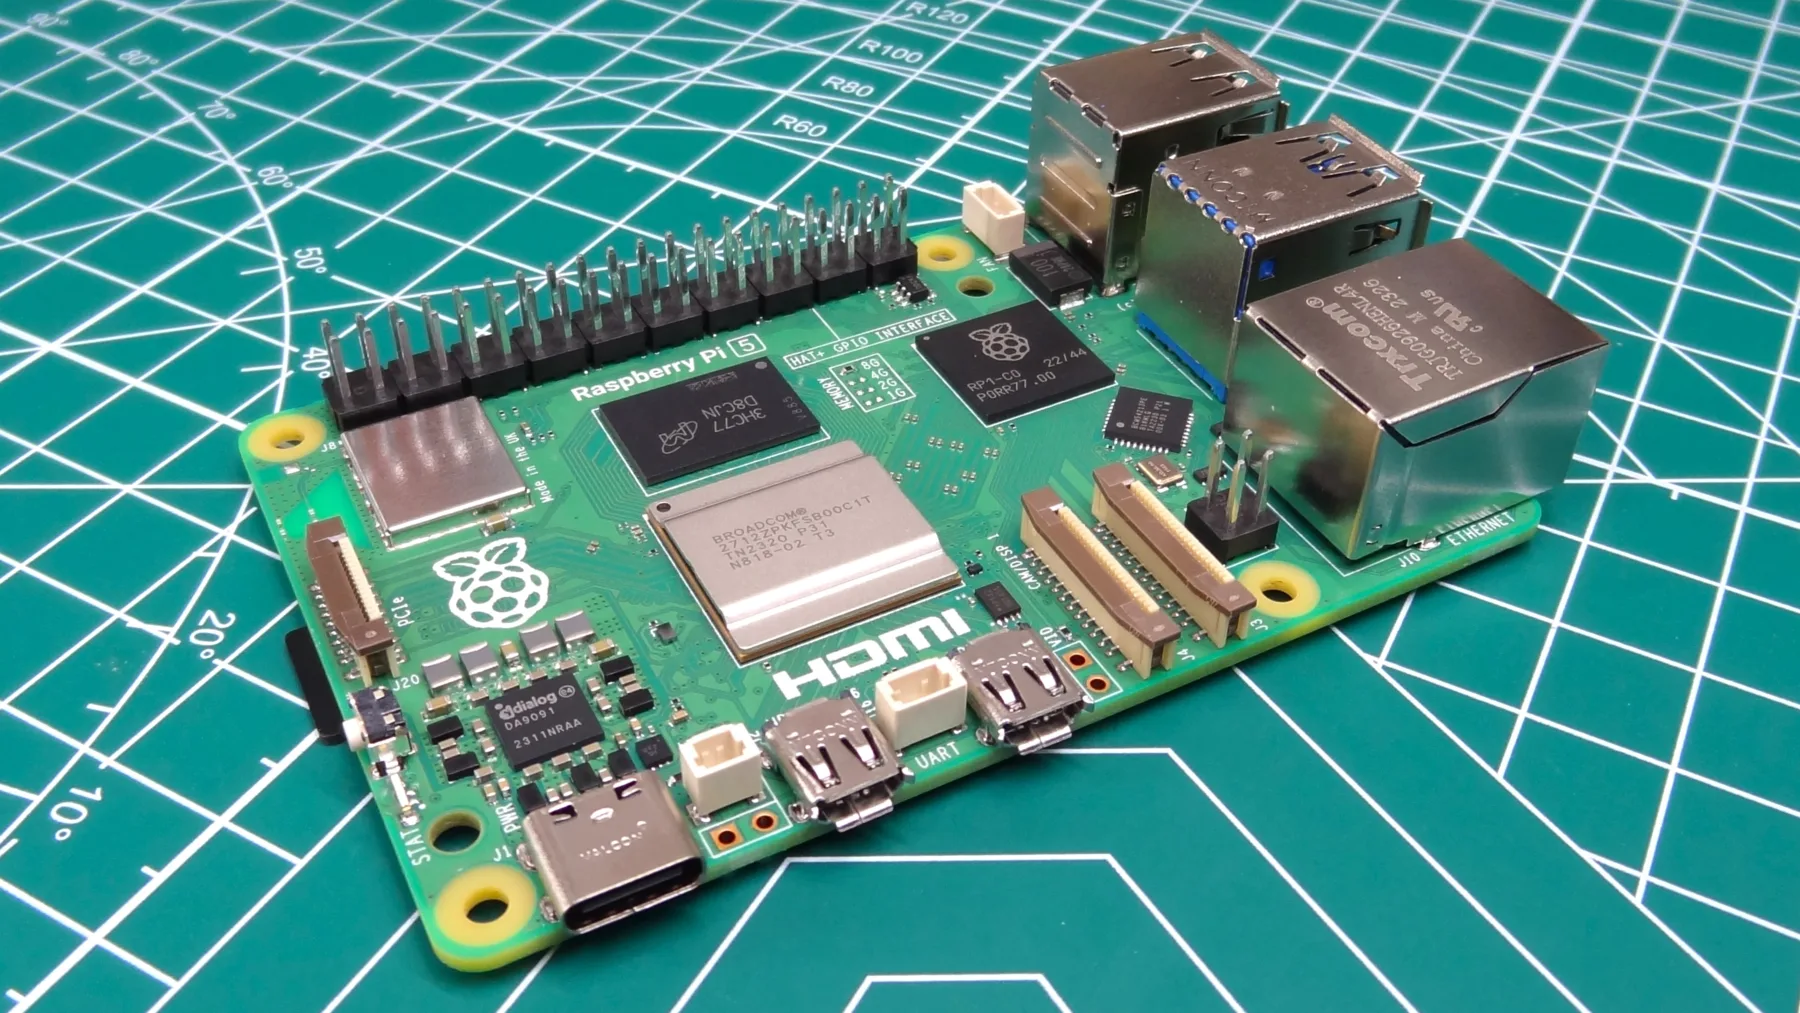
For learning and light workloads, a Raspberry Pi (around €50-95 for the Pi 5 with 4-8GB RAM) is hard to beat. It's tiny, power-efficient (using about 3-5 watts), and runs a full Linux operating system. Perfect for running lightweight AI models, home automation, or small API servers. The Pi 5 with 8GB RAM can comfortably handle our image classification API from earlier modules.
If you need more power for AI workloads, Nvidia Jetson boards (around €230-240 for the Jetson Orin Nano Super Developer Kit) come with integrated GPUs designed specifically for AI inference. They're overkill for simple projects but shine when running larger models or processing video streams in real-time.

Don't overlook that old laptop or desktop sitting unused. An x86 machine from the last decade probably has more RAM and storage than a Raspberry Pi, runs cooler than a gaming desktop, and costs nothing if you already own it. Laptops are particularly attractive because they're power-efficient and come with a built-in battery (basically a free UPS). Repurposing an old laptop as a Linux server is a popular project that teaches you server management without any upfront cost. Old workstations with dedicated GPUs can even handle serious AI workloads.
For more demanding self-hosted setups, you might build a purpose-built server using standard PC components. This gives you flexibility to choose exactly the CPU, RAM, storage, and GPU you need. Popular projects include DIY NAS builds for storage or general-purpose home servers for running multiple services. Budget builds can start around €180-450, while more capable systems run €450-1400 depending on requirements.
Installing the Operating System
Once you have your hardware, you need to install an operating system. The process varies depending on what hardware you're using, but the goal is the same: get a Linux system up and running that you can access remotely.
Raspberry Pi
The Raspberry Pi makes OS installation remarkably easy with the Raspberry Pi Imager. This official tool handles everything: downloading the OS, writing it to your SD card, and even preconfiguring settings like WiFi and SSH access. The process is straightforward: select your Pi model, choose "Raspberry Pi OS Lite (64-bit)" for a headless server, configure your settings (hostname, SSH, WiFi), and write to an SD card. The official getting started guide walks through each step with screenshots.
Nvidia Jetson
Nvidia Jetson boards come with JetPack SDK, which includes the operating system (based on Ubuntu) plus all the NVIDIA AI libraries and tools. The official getting started guide provides an SD card image you can download and write to a microSD card, similar to the Raspberry Pi process. After first boot, you'll run through an initial setup wizard to configure your username, password, and network settings. For more advanced setups, NVIDIA's SDK Manager lets you install different JetPack versions or flash the built-in storage directly.
x86 PC or Laptop
For standard x86 computers (Intel or AMD processors), Ubuntu Server is an excellent choice. Download the ISO file, create a bootable USB drive using tools like Rufus (Windows) or balenaEtcher (cross-platform), boot from the USB, and follow the text-based installer. The official installation tutorial covers the entire process, including partitioning, network configuration, and SSH setup. Ubuntu Server is lightweight, well-documented, and receives long-term support.
Architecture Considerations
In Packaging & containerization, we learned how containers package applications to "run consistently anywhere." However, there's an important caveat we didn't discuss: CPU architecture. The Raspberry Pi and Nvidia Jetson use ARM processors, while most PCs and cloud servers use x86 processors. This matters because container images are built for specific architectures.
If you try to run an x86 container image on a Raspberry Pi, it simply won't work. The ARM processor can't execute x86 instructions. It's like trying to play a Blu-ray disc in a DVD player; the physical format is similar, but the underlying technology is incompatible. Fortunately, many popular images on Docker Hub are multi-architecture images that include versions for both ARM and x86. When you run docker pull python:3.11, Docker automatically detects your system's architecture and pulls the appropriate version.
For your custom images, you have two options. The simple approach is building directly on your target hardware. If you're deploying to a Raspberry Pi, build your Docker image on the Pi itself (or another ARM machine). The image will naturally be ARM-compatible. The more sophisticated approach uses Docker's buildx feature to create multi-architecture images that work on both ARM and x86. This is what professional projects do, but it requires a bit more setup. The Docker documentation on multi-platform builds explains the process.
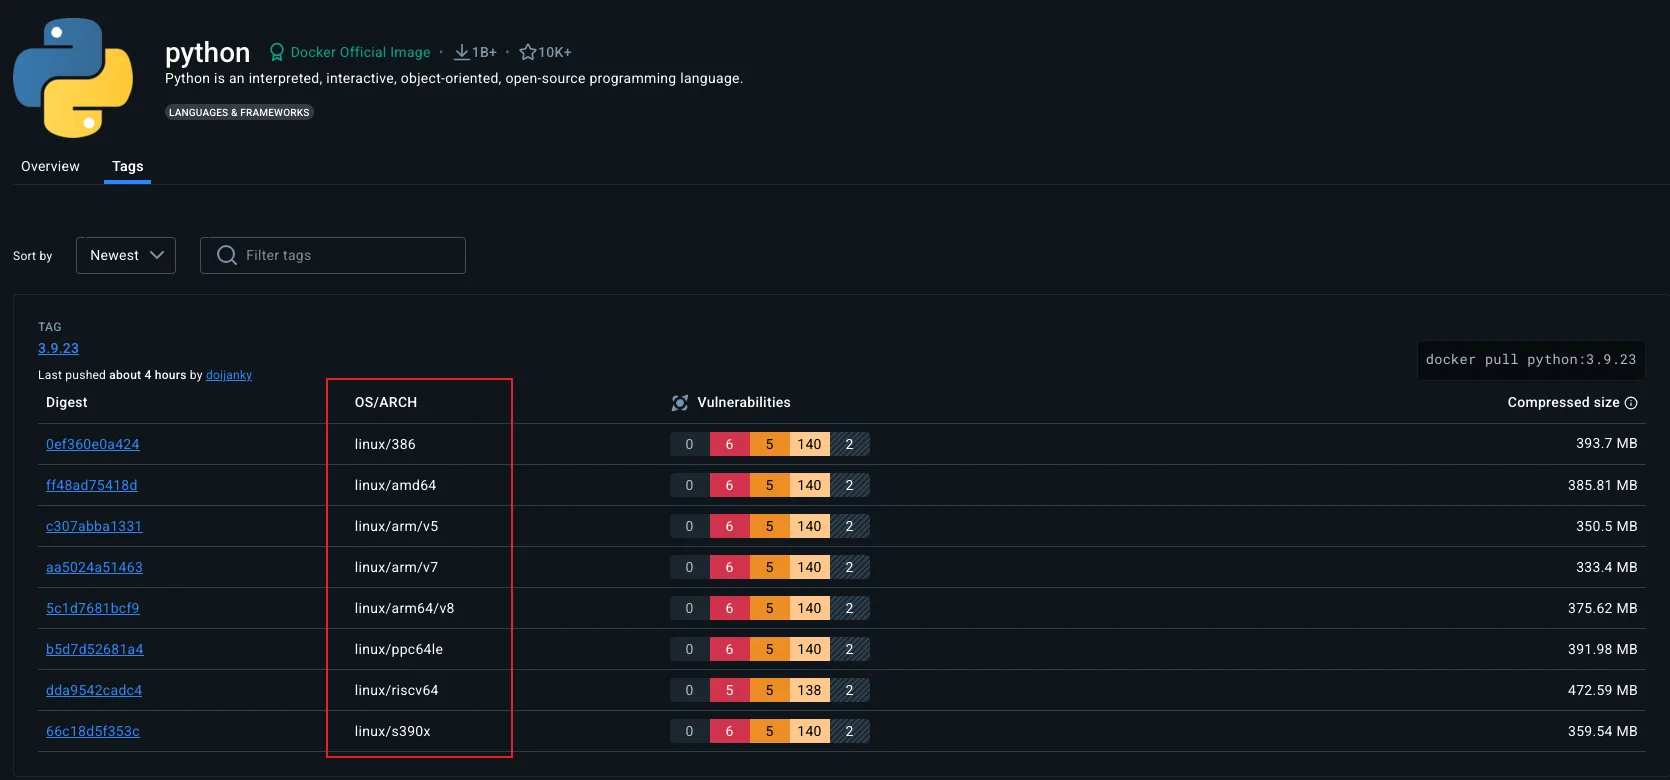
A quick way to check if an image supports your architecture: look at the image's Docker Hub page. For example, the official Python image shows supported platforms including linux/amd64 (x86), linux/arm64 (64-bit ARM like Raspberry Pi 4/5), and linux/arm/v7 (32-bit ARM like older Pis). If your architecture isn't listed, you'll need to build the image yourself or find an alternative.
Deploying Your Container
Once you have your OS installed and understand architecture considerations, the actual deployment process is identical to what we covered in Cloud Deployment. Install Docker using the official installation guide, pull or build your container image (making sure it matches your architecture), and run it with docker run.
Resource considerations depend more on your specific hardware than whether it's "edge" or "cloud." A Raspberry Pi 5 with its quad-core CPU and 8GB RAM is actually more powerful than many low-end cloud VMs. Budget cloud instances often give you 1-2 virtual CPU cores with heavily shared resources, while your Pi's dedicated cores can outperform them for many workloads. On the other hand, a 10-year-old laptop you're repurposing might struggle compared to even basic cloud offerings. The key is understanding your hardware's capabilities and choosing appropriate workloads. Our image classification API from earlier modules runs perfectly fine on a Raspberry Pi 5, and likely faster than on a €3-5/month cloud VM.
Remote Access to Edge & Self-Hosted Devices
Getting your edge or self-hosted device online is different from cloud deployment. Cloud VMs come with public IP addresses that anyone on the internet can reach. Your home server or Raspberry Pi sits behind your router on a private network, invisible to the outside world by default. Let's explore how to access your devices both locally and from anywhere.
Accessing Within Your Local Network
If you just want to use your services at home or within your organization's network, local access is straightforward and secure.
Every device on your network gets a local IP address, usually something like 192.168.1.100 or 10.0.0.50. To find your device's IP, SSH into it and run ip addr show (or ip a for short), which shows all network interfaces and their addresses. Look for the interface connected to your network (often eth0 for ethernet or wlan0 for WiFi) and find the line starting with inet. Alternatively, check your router's admin interface, which usually lists all connected devices with their IPs and hostnames.
Once you have the IP, access your service just like you would a cloud server, but using the local address. If your API runs on port 8000, visit http://192.168.1.100:8000 from any device on the same network. SSH works the same way: ssh [email protected]. This is the same remote access concept we covered in Cloud Deployment, just with a local IP instead of a public one.
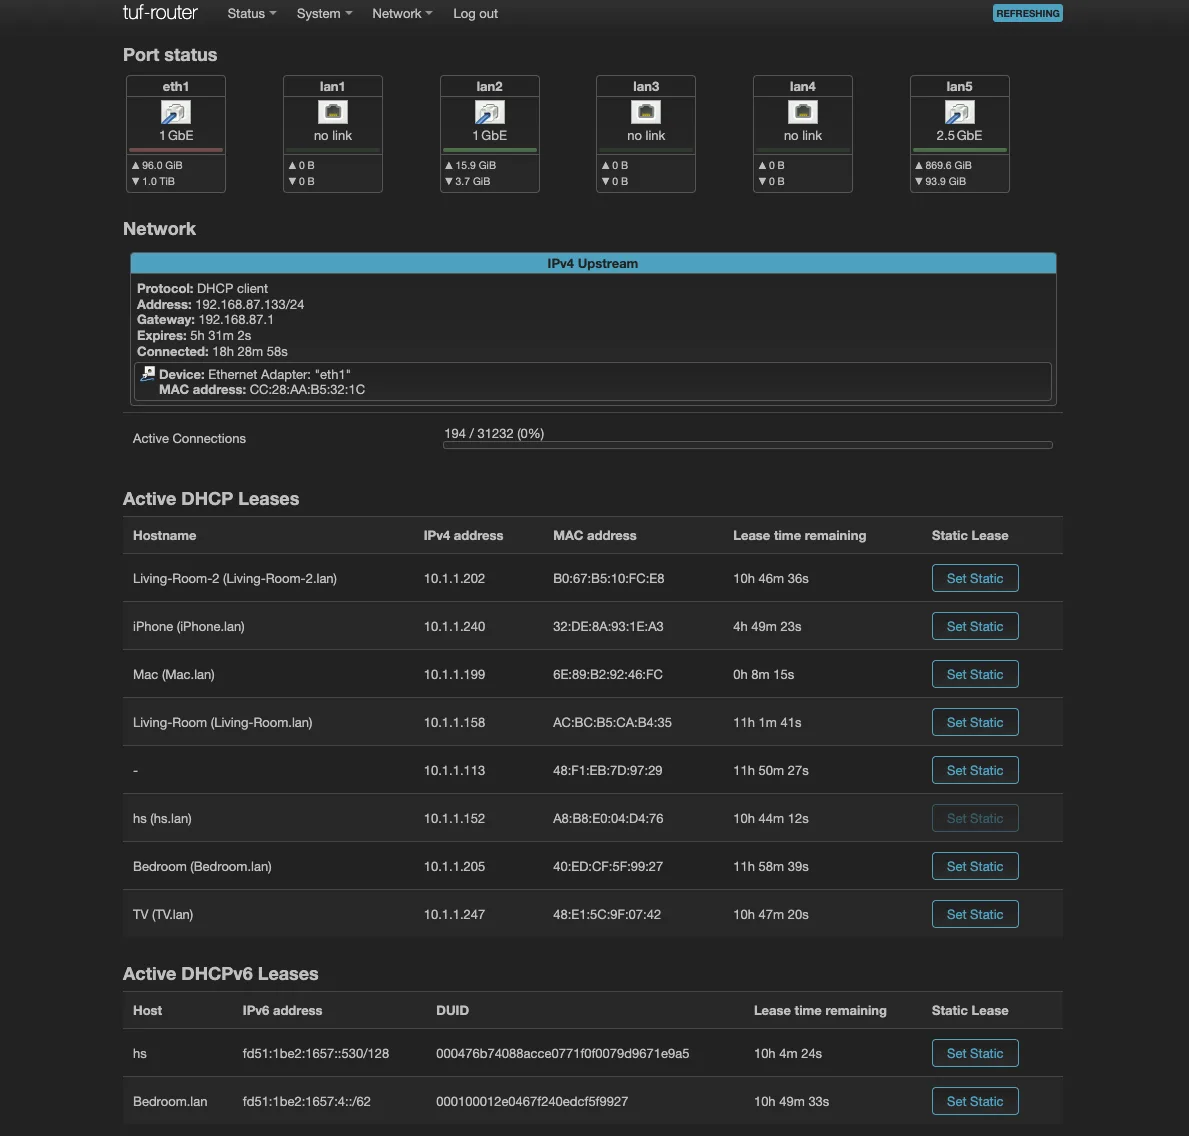
For convenience, configure your router to assign a static local IP to your device so the address doesn't change when the device reboots. Look for "DHCP reservation" or "static IP assignment" in your router settings. This way, you always know where to find your server.
Extended Reading: You can actually get SSL certificates for local services even if they're not accessible from the internet. Remember the DNS challenge method we mentioned in Cloud Deployment? With DNS-based validation, certificate authorities like Let's Encrypt verify domain ownership through DNS records rather than HTTP requests. This means you can obtain valid SSL certificates for services running purely on your local network.
Using tools like Traefik with DNS challenge or cert-manager, you can automatically request and renew certificates for domains like
homeserver.yourdomain.comthat resolve to local IPs like192.168.1.100. Your devices will trust these certificates just like they trust any public website's certificate, eliminating browser security warnings for your local services.
Making Services Publicly Accessible
What if you want to access your home server from anywhere, or share your service with others? This is trickier because incoming connections to home networks are blocked by default. Your router uses NAT (Network Address Translation) to share one public IP among all your devices, and without special configuration, external requests can't reach specific devices on your private network.
You have several options, each with different tradeoffs.
Option 1: Public IP Address (Static or Dynamic)
The most straightforward approach is using a public IP address from your ISP. This comes in two flavors:
Static Public IP: Some ISPs offer static public IPs as an add-on service for €5-18/month. The IP never changes, making it the simplest option. You point your domain directly to this IP, configure port forwarding on your router, and you're done. The downside is the extra cost and limited availability (not all ISPs offer this, especially for residential connections).
Dynamic Public IP: Many home internet connections already come with a public IP, it just changes periodically (every few days, weeks, or when your router reboots). This is where Dynamic DNS (DDNS) becomes essential. Services like DuckDNS give you a domain name (like yourname.duckdns.org) that automatically updates to point to your current IP. You run a small script on your server that periodically checks your public IP and updates the DNS record whenever it changes. This solution is free and works for most people.
With either approach, you configure port forwarding on your router to direct incoming traffic on specific ports (like 80 and 443 for HTTPS) to your server's local IP. The benefit is complete control and direct access. The downside is security responsibility: your home network is exposed to the internet, requiring proper firewall configuration and ongoing maintenance.
Important caveat: Some ISPs use CGNAT (Carrier-grade NAT), where multiple customers share a single public IP. In this case, you don't have a truly public IP address, and this option won't work. You'll need to either request a public IP from your ISP (sometimes available for a fee) or use one of the tunneling solutions below.
Extended Reading: Many ISPs now provide IPv6 connectivity alongside IPv4. Unlike IPv4, IPv6 was designed with enough addresses that every device can have its own globally routable public address, so no NAT is needed. If your ISP supports IPv6, each device on your network gets a public IPv6 address, making them directly accessible from the internet (subject to firewall rules). This bypasses the entire NAT problem. The main challenges are that not all internet users have IPv6 yet (so you might need both IPv4 and IPv6), and many home routers still block incoming IPv6 by default for security. Check if your ISP provides IPv6 and configure your router's IPv6 firewall rules accordingly.
Option 2: WireGuard VPN Tunnel + Cloud Proxy
If you can't get a usable public IP (due to CGNAT or ISP restrictions), you can work around this by using a cheap cloud VM as an intermediary. This solution works for any edge or self-hosted device as long as it has outgoing internet access.
The setup: rent a small VPS with a public IP (often €3-5/month), have your device establish a WireGuard VPN tunnel to the cloud VM (an outgoing connection that bypasses NAT), and run a reverse proxy (like Nginx or Traefik from Cloud Deployment) on the cloud VM to forward traffic through the tunnel to your device.
From the internet's perspective, people connect to your cloud VM's public IP. The cloud VM proxies requests through the encrypted WireGuard tunnel to your device, which processes them and sends responses back through the same tunnel. Your device never needs to accept incoming connections; it only maintains an outgoing VPN connection.
This approach is secure, flexible, and works from anywhere your device can reach the internet. An additional benefit: if you're running resource-hungry services (like AI models) or need lots of storage, you can use powerful hardware for your edge/self-hosted device while keeping the cloud VM minimal and cheap. Since the cloud VM only handles traffic proxying, even a €3/month VPS with 1 CPU core and 1GB RAM works fine. You get the best of both worlds: cheap public accessibility and powerful local compute/storage.
The downside is managing both a cloud VM and the VPN tunnel, plus a small latency increase from the extra hop. Resources like this tutorial walk through the complete setup.
Extended Reading: If manual WireGuard configuration sounds intimidating, Tailscale offers a simpler alternative. Tailscale is built on top of WireGuard but handles all the configuration complexity for you. Instead of manually generating keys and editing config files, you sign in with your Google or GitHub account, install the Tailscale client on your devices, and it automatically creates a secure mesh network.
The key difference: Tailscale creates peer-to-peer connections. If you're okay with the requirement that all client devices connecting to your edge/self-hosted server also need to install Tailscale, then you don't need a cloud VM at all. Your laptop, phone, and server all join the same Tailscale network and can talk to each other directly (or through Tailscale's relay servers if direct connection fails). This is perfect for personal use where you control all the client devices.
If you need to expose services to the public internet where users don't have Tailscale installed, you can still use the WireGuard + cloud VM approach described above, or combine Tailscale with a cloud VM to get the best of both worlds: easy VPN setup between your devices and the cloud proxy.
Tailscale is free for personal use (up to 3 users and 100 devices). For those who want Tailscale's ease without depending on their coordination servers, Headscale is a self-hosted, open-source alternative you can run on your own infrastructure.
Option 3: Cloudflare Tunnel
If you want the simplest solution and don't mind depending on a third-party service, Cloudflare Tunnel is hard to beat. It's free for personal use and handles all the complexity for you.
You install a lightweight daemon called cloudflared on your device, which creates a secure outbound tunnel to Cloudflare's network. Cloudflare then routes traffic from your domain to your device through this tunnel. No VPN setup, no cloud VM to manage, no port forwarding. You configure everything through Cloudflare's dashboard, point your domain's DNS to Cloudflare (which is free), and you're done. The official getting started guide walks you through the entire process.
The benefits are significant: extremely easy setup, free, managed security and DDoS protection, and fast global performance thanks to Cloudflare's CDN. Your home IP address stays hidden, adding privacy. The downside is vendor lock-in. You're dependent on Cloudflare's service, and if they change their terms or have an outage, your services go down. Some users also prefer not to route all their traffic through a third party, even one as reputable as Cloudflare.
Extended Reading: Cloudflare Tunnel isn't the only managed tunneling service. Ngrok is the most popular alternative, known for its developer-friendly features like request inspection and webhook testing. It has a free tier limited to development, with paid plans for production use. Pinggy offers similar functionality with competitive pricing and collaborative features. LocalTunnel is a free, open-source option that's simpler but less feature-rich.
For a comprehensive list of tunneling solutions including self-hostable options, check out awesome-tunneling on GitHub. This curated list includes everything from commercial services to open-source projects you can run on your own infrastructure, giving you alternatives if you want to avoid depending on third-party services entirely.
Choosing the Right Approach
Which option makes sense depends on your situation and priorities.
For learning and local-only use, stick with LAN access. No need to expose services to the internet while you're experimenting. If you have a public IP (static or dynamic) and want full control, Option 1 is the simplest. Just remember you're responsible for security. If you're behind CGNAT or want to keep your home IP hidden, Option 2 (WireGuard/Tailscale) gives you maximum flexibility and control, though with added complexity. If you want the easiest solution for public access and don't mind trusting a third party, Option 3 (Cloudflare Tunnel) is perfect for personal projects.
Whatever you choose, remember that exposing services to the internet comes with security responsibilities. Keep your software updated, use strong authentication, monitor your logs, and only expose services you actually need to be public.
Videos:
Exercise
Self-host Your API Server
Deploy your containerized API server from Packaging & containerization on local hardware instead of the cloud. This exercise teaches you the fundamentals of edge and self-hosted deployment.
- Choose your hardware: Raspberry Pi, an old laptop, a desktop PC, or even your daily computer for testing
- Install a Linux operating system if not already running one (Ubuntu Server recommended for x86 machines, Raspberry Pi OS for Pi)
- Install Docker and deploy your containerized API server on the local hardware
- Verify the service works on your local network by accessing it from another device (phone, laptop) connected to the same WiFi
Advanced Challenges (Optional):
- Make your locally-hosted service accessible from the internet using one of the three approaches covered in this module, then test by accessing from a different network (mobile data, coffee shop WiFi, etc.)
- Set up HTTPS for your local service using one of the approaches covered in this module and the previous one
- If using Raspberry Pi or other ARM hardware, build a multi-architecture Docker image that works on both x86 and ARM platforms